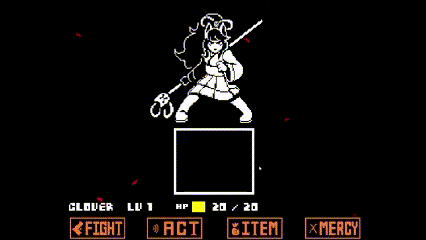
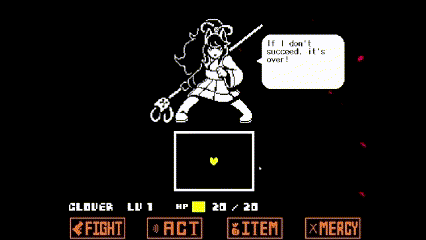
Overview
Don't be pulled away from the fact that this is the final boss for True Pacifist. Ceroba is actually an extreme pushover if you manage to get the Golden Bandana as well as activate Easy Mode! You don't even need to bring a single Healing Item with you as the sheer defense you have + the power of Endure can allow you to heal off all the attacks Ceroba throws at you!
PS: On the first phase. You have to end the fight with atleast 3 HP. Anything lower will crash the game
Loadout
Weapon: Doesn't Matter
Armor: Golden Bandana
Easy Mode: Enabled
Healing Items:Full HP Healing Items
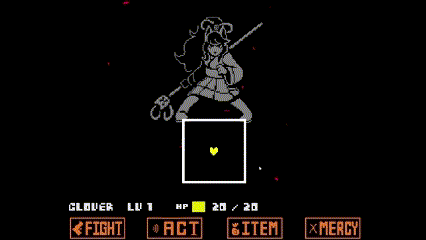
Phase 1
Description
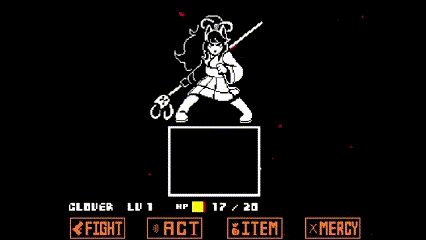
Don't worry too much on this phase. The attacks only deal 1 damage each, and you heal back to full health once completed. You don't need to be absolutely perfect here!
Attacks
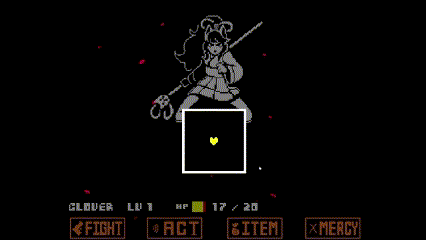
First Attack: Exploding Balls
Hold Bottom-Right

Guaranteed No-Hit
Mercy > Spare
Second Attack: Flower Wall
Stay on one of the corners to minimize as much damage as possible
3-7 Hits. Chance for less. Lower chances for a No Hit
Mercy > Spare
Third Attack: Leaf Pile
Hold Up
Four Hits at most. Chance for lower
Mercy > Spare
Fourth Attack: Shooting Flowers
Wait until the start of the freeze sound effect then immediately hold Bottom-Right
Likely chance for a No-Hit. Two Hits if unlucky
Mercy > Spare
Fifth Attack: Flower Circle
Wait three seconds then move Up. Wait a second after the explosion sound effect has finished and move the opposite direction. Repeat for the rest of the attack
Tricky No-Hit. Chance for a few hits
Mercy > Spare
Sixth Attack: Exploding Balls with Colored Shockwaves
Rush to the Bottom-Right and hope you don't get hit a lot.
Four Hits at most. Chance for Three Hits
Heal if HP <= 9. Otherwise, Mercy > Space
Seventh Attack: Flower Circle + Black Hole
Hold Up and hope you don't get hit a lot

Chance for a No-Hit. 4 Hits at most
Mercy > Spare
Eight Attack: Exploding Pillars
Hold Down
Two Hits at most
Mercy > Spare
Ninth Attack: Circling Swords + Shooting Flower
Go down. Wait until the ding sound effect which indicates that the swords are starting to move. Move in a circle while holding X to limit Clovers movement. Wait until the shooting flower shows up and hold Up
One Hit. Small Chance for a Second Hit
Mercy > Spare
Tenth Attack: Circling Balls + Huge Explosion
Go Top-Right and don't move once you reach the corner
High Chance for a No-Hit. Small Chance for a Single Hit
Result
Best Possible Attempt: 9 Hits
Best Recorded Attempt: 22 Hits / 2 Heals (one unecesarry heal) by AstrasEvolution: Video
For the rest of the phases going forward. It is assumed that Auto-Fire is enabled. Especially for the intro attack in Phase 2, as it uses timing from the soul shots (You might need to die once to have the Auto-Fire take effect the moment the battle starts)
Phase 2
Description
At this point. Damage taken doubles from 1 > 2 (unless you have Easy Mode enabled). Although this main seem bad, this can still be beaten fairly easily!
Attacks
Intro Attack
Start by counting the amount of times Clover has shot a bullet from the Auto-Fire. As they will be used to time your movements
Mask Attacks
Hold Up
On the 13th shot, hold Down
On the 14th shot, hold Bottom-Right
On the 17th shot, hold Left
On the 20th shot, hold Top-Right
On the 23rd shot, hold Down
On the 26th shot, hold Left
Afterwhich. You can stop counting the bullets and continue to the next part
Simple No-Hit
Wall Attack
Listen closely for if your attack has hit something. If it has, that means you are on the correct side. If it hasn't, switch to the other side to avoid a hit
Tricky but Doable No-Hit
Circling Flowers
If you are still on the bottom. Just stand still and hope that the circling flowers don't hit you that much
(Four Hits Maximum. Chance for less)
Act > Endure
First Attack: Floaty Thingies
Go to the bottom of the battle box and alternate between dashing Left and Right
Chance for a No-Hit. Chance for 1-3 Hits
Act > Endure
Second Attack: Mask Fire
Run around in a circle whilst dashing
Chance for a No-Hit. Chance for 1-3 Hits
Act > Endure
Third Attack: Spining Floating Thingies
Run around in a circle (clockwise) while dashing
Chance for a No-Hit. Chance for 1-3 Hits
Act > Endure
Fourth Attack: Exploding Balls
Go to the top of the battle box. When a bomb explodes, wait for around 2 shots and dash Down
5 Hits Minimum. Chance for less
Act > Endure
Fifth Attack: Wall Attack
At this point. The shield is already extremely damaged that a few extra shots will destroy it before this attack could even start. So you may not need to worry about the fifth attack
No-Hit if the Shield is low enough. 1-2 Hits if not
Act > Endure
Shield Protectors
Stay at the bottom of the screen and start destroying the shield protectors. There are two in the middle, one of the left, and one on the right. You can tell that you are not hitting anyone if a hit sound isn't playing
(Strategy for dodging the white shockwaves still being created)
Phase 3
Description
Attacks from this point start to become random. So your best bet is to destroy the shield as quickly as possible. This is why you stock up on items just in case you feel like you are running low on Health
At the start of the phase. Select Hope to gain a shield which can absorb a single hit (Right, Select) After that, prioritize more on Endure to heal up. If you feel as if you are running low on HP in that a single Endure doesn't fully heal you, consume an item
Attacks
Random Attacks
Stand at the bottom of the battle box for 4 shots and alternate between dashing from Up to Down every 2 shots
Shield Protectors
Same thing from the Random Attacks. You should also get a one cycle!
Phase 4
Description
Similar to the previous phase. You want to destroy the shield as fast as possible. But this time, you REALLY want it destroyed. As the new attacks makes it even harder to dodge than before (Think of Phase 3 as like the "Lite" version of Phase 4)
Once again. Select "Hope" to gain a shield which absorbs one free damage. Every other attack from this point on should be "Endure"
Attacks
First Attack
Start by counting the amount of times Clover has shot a bullet from the Auto-Fire. As they will be used to time your movements
Staff Projectile
Hold Down. Stay in the middle while alternate between dashing Up and Down for every even shot starting from 4. Making sure to stop at 14 to continue to the next part
Easy No-Hit
Fire Everywhere
Hold Bottom-Left. After the 23rd shot, hold Right and stop at the 26th shot
One Hit. Second Hit if timed improperly
Random Attacks
After this, the rest of the attacks from here should be similar from the previous phase. Do note that more attacks are introduced, but it's still better to continue the same strategy as before. Especially if you have Easy Mode enabled
Shield Protectors
Repeat the same thing for Phase 3. But include another cycle!
Completions
Notes:
Completed her run before I even started charting phases 2-4. Easy Mode Enabled. Around 6 Healing Items used in the entire run.
Notes:
Easy Mode Disabled. No Healing Items used. A single death is included in Phase 2 for a No-Hit setup